From Seed to Smoke: A Day in the Life at Divine Toke Farm
Jamie
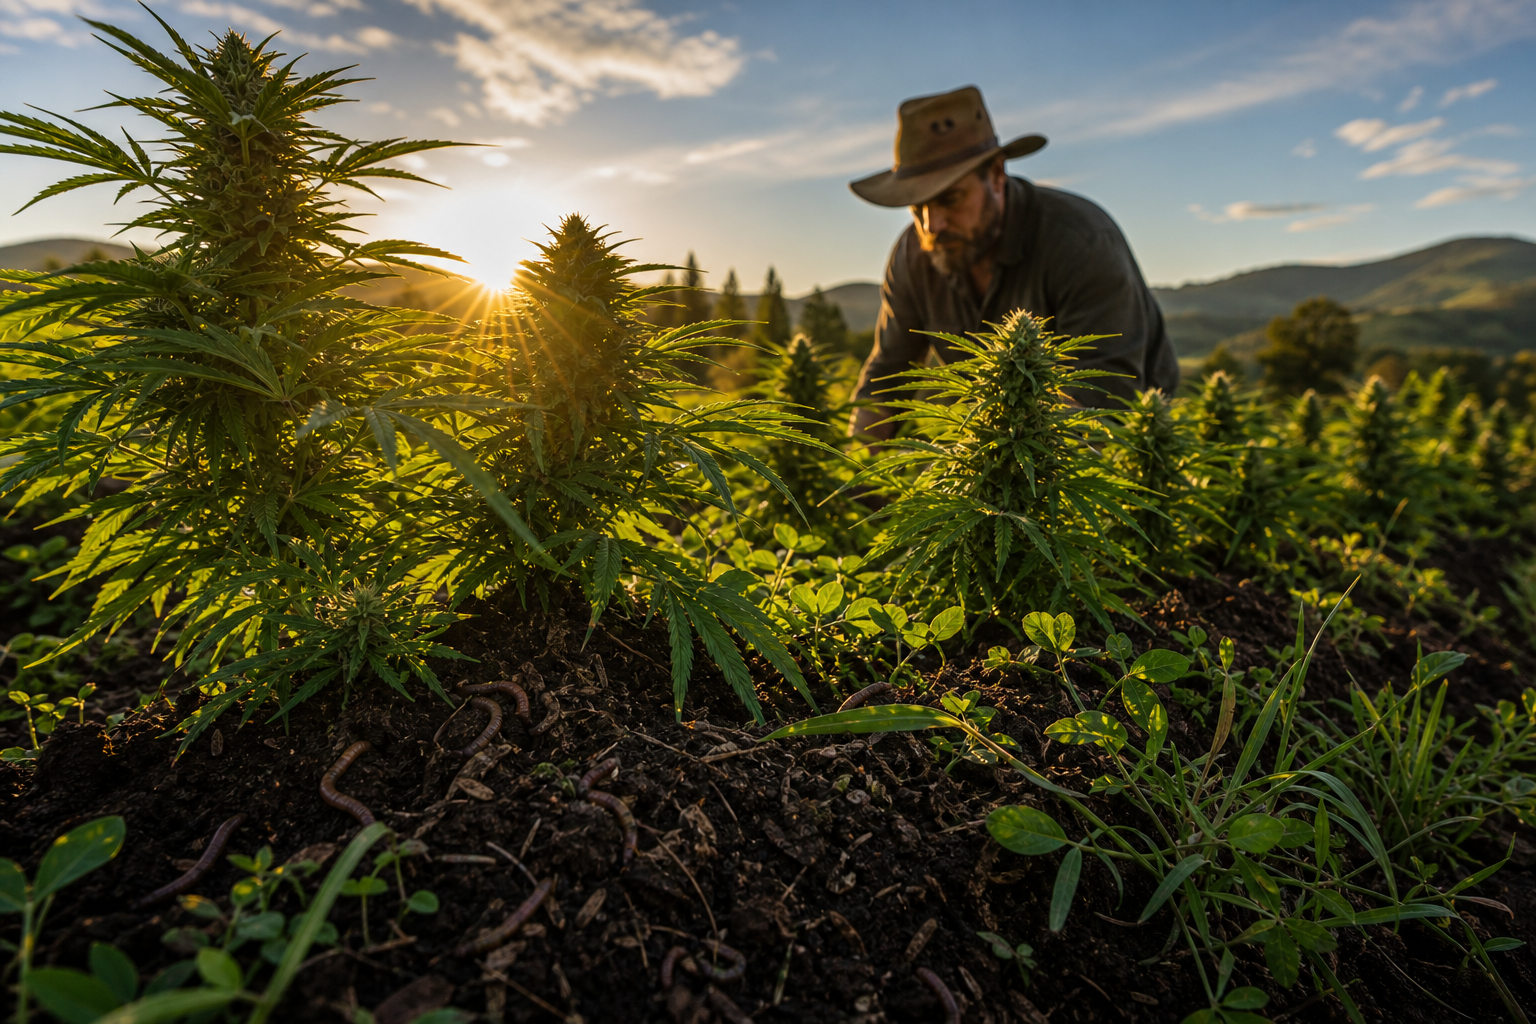
Head Cultivator
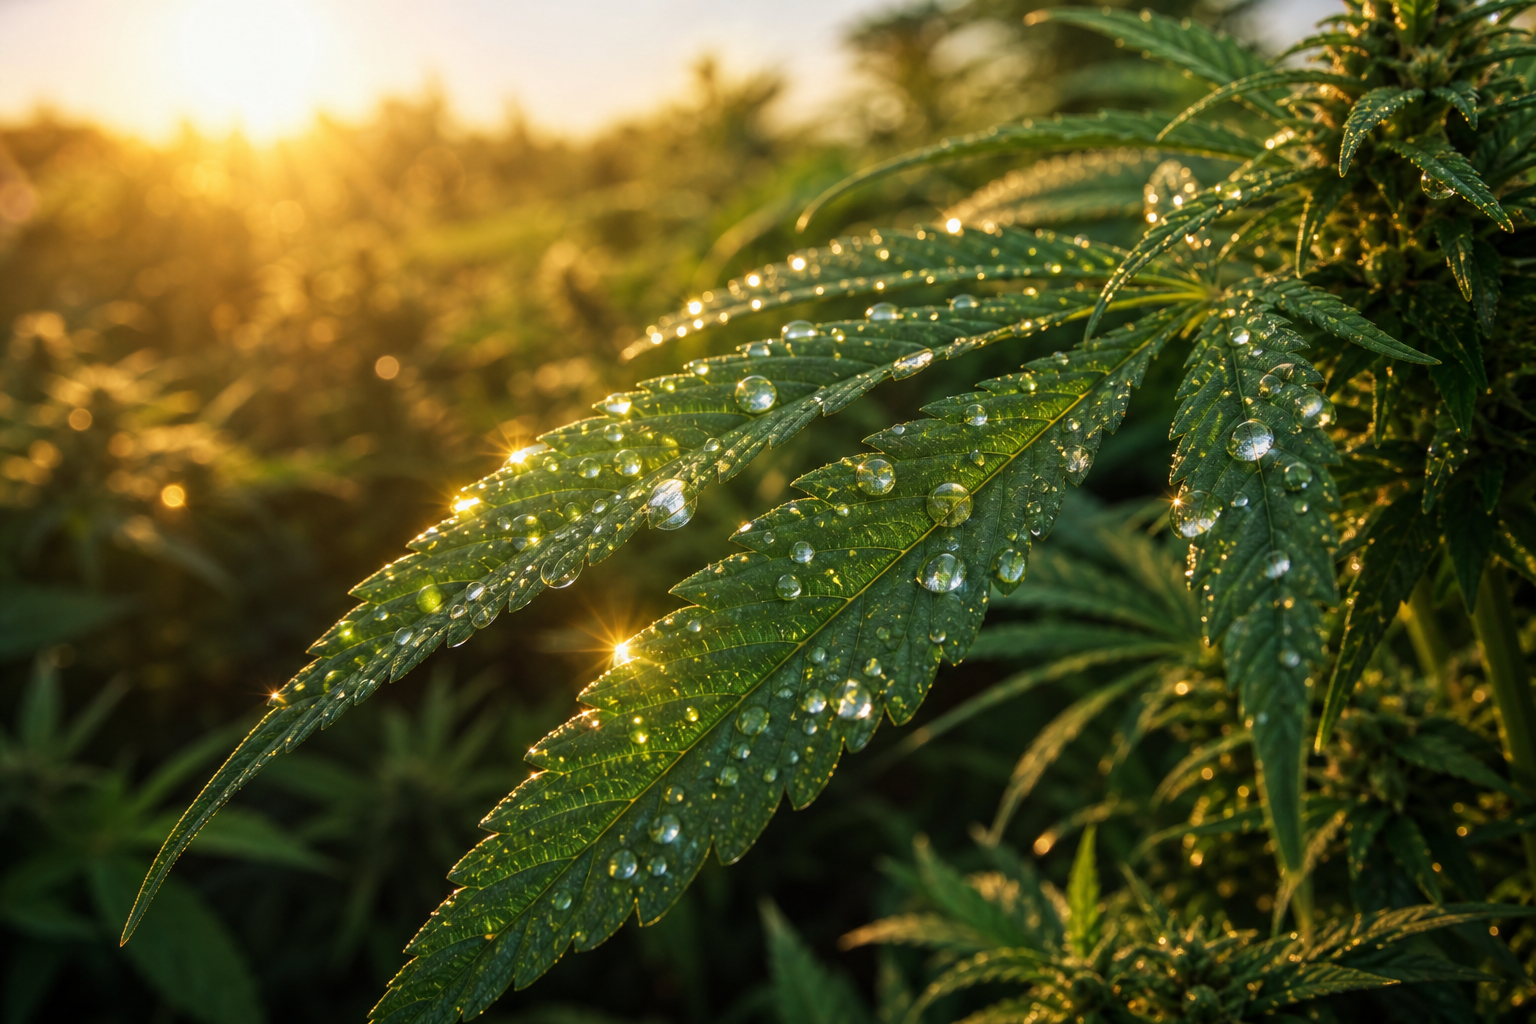
People ask us all the time: what actually goes into the flower they buy? Most of the story happens long before it hits the shelf — in the dirt, under the sun, at 6am when the dew is still on the leaves. Here's the honest version.
What Does "Seed to Smoke" Really Mean? #
From the moment a seed cracks open in soil to the day your jar is filled, a sun-grown cannabis plant travels through six distinct phases — each one shaped by daily human labor, living biology in the ground, and the real Michigan sun. There is no shortcut. No machine does the thinking.
A lot of people assume cannabis grows itself and someone just harvests it. The reality is closer to running a small vegetable operation with a lot more variables and a much longer timeline. On an outdoor, regenerative farm, the full cycle from seed to cured flower runs roughly five to six months. Every week of that time has specific jobs: things to check, things to fix, and things to protect.
Here is what the season actually looks like — stage by stage, task by task.
Stage 1: Starting Seeds and Building the Nursery #
Seeds go in weeks before the outdoor beds are ready — usually late winter or early spring indoors under minimal light, then moved to a protected outdoor nursery once nighttime temps stabilize above 50°F.
Germination and Seedling Care #
Germination is low-tech on a living-soil farm. Most outdoor growers start seeds in small plugs or soil blocks, keep them moist and warm at around 70–75°F, and watch for the tap root to emerge in two to seven days. Once the seedling pops and gets its first set of true leaves, the real watching starts.
Daily seedling tasks are about moisture, not nutrients. Overwatering kills more seedlings than anything else. The crew checks trays every morning — press the soil, feel the weight of the tray, look at the stem color. Weak seedlings get removed early so they don't crowd the healthy ones. The goal is a uniform, stocky plant with a thick stem before it ever sees a full day of outdoor sun.
Preparing the Living-Soil Beds #
While seeds are growing in the nursery, the beds get built. On a living-soil farm, this means layering in compost, worm castings, aged wood chips, and amendments like kelp meal or biochar well before any plant goes in. According to Torrwood Farm's overview of living soil, building living soil starts with organic matter — compost, worm castings, and decaying plant material — that feed the microbial community and allow it to cycle nutrients for the plant over months, not days.
The difference between living soil and a conventional setup is timing. In a conventional grow, you mix nutrients into water and pour them directly on the roots. The plant gets what you give it, when you give it. In living soil, you build a biology that feeds the plant on its own schedule. That means bed preparation is not a weekend job — it is something that happens weeks or months before transplant so the microbial population has time to establish and stabilize.
| Task | Timeline | Why It Matters |
|---|---|---|
| Mix compost and amendments into beds | 4–8 weeks before transplant | Lets microbes colonize and stabilize |
| Water beds to activate biology | 2–4 weeks before transplant | Wakes up beneficial fungi and bacteria |
| Plant cover crop or mulch if needed | 3–6 weeks before transplant | Holds moisture, adds biomass |
| Final soil check and pH test | 1 week before transplant | Confirms conditions before plants go in |
Stage 2: Transplant Day — Getting Plants in the Ground #
Transplant day is one of the biggest labor days of the year — holes dug, plants moved from nursery trays to permanent beds, watered in, and watched for the first 48–72 hours for transplant stress.
Timing matters more than most people realize. Too early and a cold snap can set the plants back weeks. Too late and you lose vegetative growing time before the light cycle flips in fall and triggers flowering. Most outdoor Michigan growers target transplant after the last frost, typically mid-May to early June depending on the year.
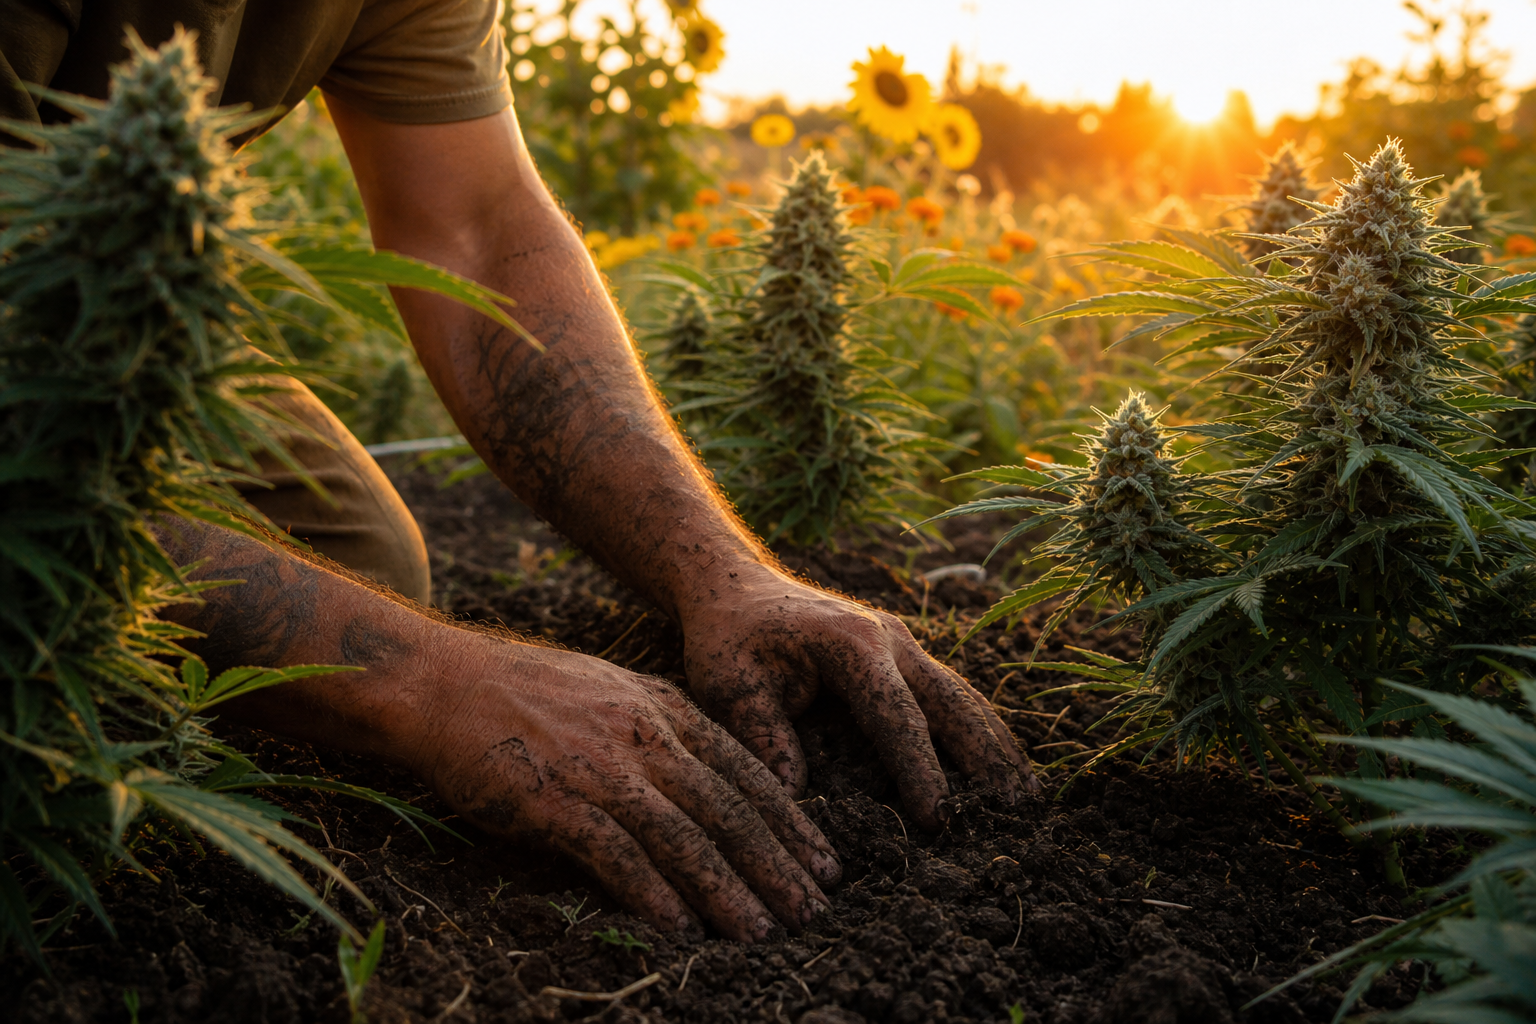
On transplant day, the whole crew is out. Plants go in by hand. Each hole gets dug to the right depth, the root ball dropped in gently (tearing roots during transplant is a real setback), and the soil pressed firm around the stem. After planting, everything gets a deep water to help the root zone settle.
The first week after transplant is a "watch and wait" period. Plants may droop slightly for a day or two — normal transplant shock. The crew checks each plant the next morning, looks for wilting or discoloration, and adjusts irrigation if anything looks off. No aggressive feeding during this window. The living soil has what the plant needs; the job right now is just to keep conditions stable while roots explore the new bed.
Companion plants — marigolds, sunflowers, clover, fennel — often go in at the same time or shortly after. These are not decorative. They attract beneficial insects, confuse pests looking for cannabis by smell and color, and some fix nitrogen or bring up deep minerals. Read more about how we use them in our cover crops and companion planting guide.
Stage 3: The Vegetative Phase — Daily Work During the Long Days #
The vegetative phase is when the plant builds its structure — branching out, adding height, and establishing the root system it will rely on all season. This phase runs from transplant through late summer when the days start getting shorter, roughly June through early August in Michigan.
This is the most physically repetitive phase of the season. There is no dramatic moment; it is just daily maintenance, observation, and small decisions stacking up over weeks. The quality of the flower in October is built during this phase.
What the Crew Does Every Morning #
A typical morning on the farm during veg starts early — often before 7am when temps are cool. The first pass is irrigation: checking soil moisture, reading any drip or timer system if one is running, and hand-watering anything that looks dry. According to cultivation job descriptions published by outdoor cannabis operations, daily tasks include monitoring irrigation, EC (electrical conductivity — how much is dissolved in the water), pH, and plant measurements for growth tracking.
After irrigation, the crew scouts. Every plant gets looked at. Scouting means checking the undersides of leaves for pest pressure, looking at the color of new growth (pale yellow-green means a potential nutrient issue, dark green is usually fine), and watching for any signs of disease — spots, powdery mildew, wilting that doesn't match watering status.
Beyond scouting, veg days involve:
- Training and pruning: tying down branches, topping plants to encourage lateral spread and more flowering sites, removing lower growth that won't receive enough light
- Weeding: beds need consistent weeding during veg; weeds compete for nutrients and moisture and can harbor pests
- Mulching: adding compost or straw mulch around plant bases holds moisture and feeds the soil biology
- Soil amendment: small additions of compost tea or top-dressed dry amendments keep the living soil system fed
Feeding the Soil, Not Just the Plant #
On a conventional grow, feeding means mixing liquid nutrients and watering them in on a fixed schedule. On a living-soil farm, the approach flips: you feed the soil and let the biology feed the plant.
The science behind living soil describes how bacteria, fungi (especially mycorrhizae — fungal threads that extend the root zone), protozoa, nematodes, and earthworms all work together to break down organic matter into plant-available nutrients. According to 210 Cannabis Co's breakdown of the living soil food web, cultivators add worm castings, bone meal, kelp, and similar amendments to fuel the microbial community — not to directly fertilize the plant.
The practical result during veg is that the farm does not have to measure and mix nutrients every other day. The soil handles it. What the crew does instead is keep the biology alive: maintain moisture so microbes don't dry out, avoid compaction, and add organic matter regularly so there is always something for the biology to work with. It is closer to tending a garden ecosystem than running a feeding schedule.
This also means the water quality and quantity going into the beds matters a lot — chlorinated water can harm the microbial community, and overwatering compacts the soil and reduces oxygen for root-zone biology.
Stage 4: The Flower Phase — Everything Shifts #
When the days shorten past roughly 12 hours of light — usually late August in Michigan — cannabis plants switch automatically from building structure to building flowers. Everything the farm does from this point forward is about protecting and supporting that process.
The vibe on the farm changes during flower. Veg was steady and somewhat routine. Flower is more urgent. The plants are doing the most complex biological work of their lives, and there are more ways for things to go wrong: mold, pests finding flower sites, nutrient issues showing up in buds. The crew goes from building the plant to protecting it.
Daily routines during flower:
- Scout every plant, every day — not just a general walk but hands-on, getting under the canopy, looking at the interior bud sites
- Check humidity levels, especially in late flower when dense buds are more vulnerable to botrytis (bud rot) — a mold that can destroy a crop in days if caught late
- Support heavy branches with stakes or ties so they don't break under the weight of developing colas
- Defoliation — careful removal of fan leaves that block airflow and light to lower bud sites — is done in the first weeks of flower
- Companion plant maintenance continues, with focus on insectary plants that attract predatory insects
Scouting, IPM, and Keeping Pests Out Without Chemicals #
Integrated pest management (IPM) is the framework regenerative farms use to handle pests without defaulting to chemical sprays. According to the Massachusetts Cannabis Control Commission's IPM Guidance, IPM combines monitoring, sanitation, physical barriers, biological controls, and only limited, last-resort pesticide use to manage pest problems while protecting the broader ecosystem.
In practice on an outdoor sun-grown farm, the IPM toolkit looks like this:
| IPM Strategy | What It Looks Like on the Farm |
|---|---|
| Monitoring | Daily scouting; sticky traps; action thresholds before intervention |
| Cultural controls | Airflow management, healthy root zone, sanitation, removing infected material |
| Biological controls | Releasing predatory mites against spider mites; ladybugs for aphids; beneficial nematodes for soil-dwelling larvae |
| Physical controls | Row covers early season; sticky barriers on posts to stop crawling insects |
| Last-resort inputs | Only when pest pressure crosses an action threshold; organic-compliant materials only |
The IPM Institute's framework for regenerative agriculture emphasizes that the goal is not zero pests — it is keeping pest populations below the level where they cause meaningful damage. A few aphids on a few leaves is not a crisis. An aphid colony on 30 plants that's spreading is. The distinction is why daily scouting matters: catching problems early means smaller, cheaper interventions.
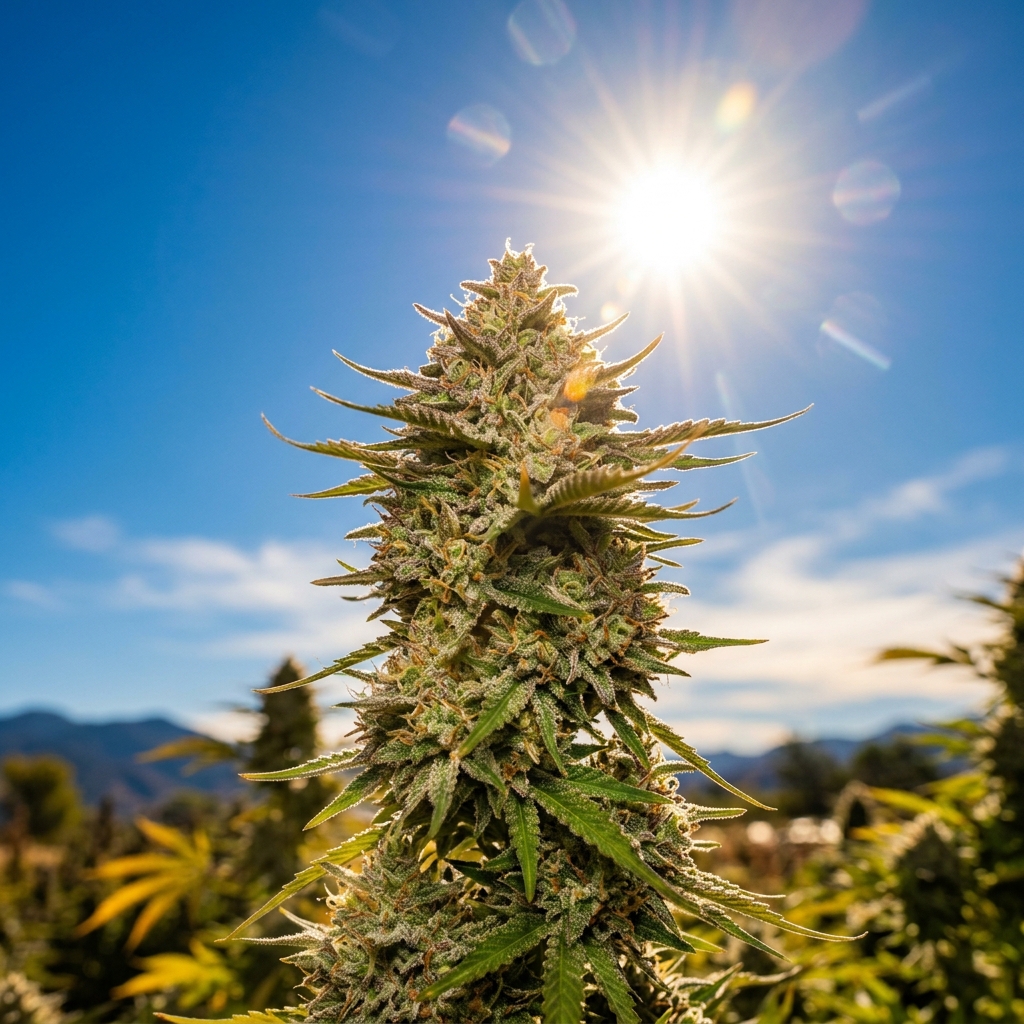
Why Sun and UV Matter During Flower #
This is where sun-grown cannabis earns its reputation. Natural sunlight contains UV-A and UV-B radiation that most indoor lighting systems — LED and HPS alike — do not replicate well. When cannabis plants are exposed to this UV spectrum during flower, the plant responds by ramping up trichome production as a protective response, according to Project CBD's analysis of sun-grown vs. indoor cultivation. Trichomes — the tiny resin glands on the flowers — are where cannabinoids and terpenes live.
The Sun Grown Cannabis Alliance has published educational materials on this mechanism, noting that the full spectrum of natural sunlight supports a wider range and more intense expression of terpenes compared to the narrower light spectrum in most indoor setups. Growers and testing labs have noted that sun-grown flower often shows a broader cannabinoid and terpene profile — meaning more compounds beyond just THC, including CBD, CBG, and CBC — compared to highly engineered indoor grows optimized for maximum THC output.
Stage 5: Harvest — The Most Intense Week of the Year #
Harvest is the week everything has been building toward — and it is also the most physically demanding period on the farm. Timing it right is the difference between peak quality and a missed window.
Knowing When to Cut: Reading the Plant #
You cannot pick an arbitrary date and harvest. The plant tells you when it's ready, and reading that signal takes experience. The main indicators:
- Trichome color: Under a jeweler's loupe (a small magnifier), trichomes shift from clear to milky white to amber as they mature. Most farmers target a window of mostly milky with a small amount of amber — this is when the cannabinoid profile is at its most complex
- Pistil color: The hair-like pistils on the flowers turn from white to orange-red as the flower matures. A flower that is 60–80% orange is usually in the target window
- Calyx swelling: Ripe buds swell slightly as the calyxes (the base structures of the flower) fill in
- Smell: Experienced growers use smell as one data point — the terpene profile shifts as the plant ripens
Cutting too early means lower cannabinoid levels and immature terpenes. Cutting too late means THC starts converting to CBN (a more sedating compound) and the window narrows fast.
The Harvest Push #
On harvest day, the crew starts before sunrise. Plants are cut at the main stalk and hung or placed in buckets for transport to the drying space. Some farms wet-trim (removing fan leaves and sugar leaves from the fresh bud before drying) and some dry-trim (drying whole branches, then trimming after). Each approach has tradeoffs — wet trim speeds drying and reduces mold risk in humid climates; dry trim is slower but many growers believe it preserves terpenes better.
Harvest days are long. Every hand is busy. Tools get cleaned between plants to avoid spreading any disease. The pace is steady because the goal is getting material into a controlled drying environment as quickly as possible — leaving cut branches sitting in the sun or warm air degrades quality fast.
This is the phase where regenerative farms mentioned by the Sol Spirit Farm apprenticeship program describe "push days" — everyone in the field, structured workflow, coordinated logistics from field to dry room to avoid bottlenecks.
Stage 6: Drying and Curing — Patience Is the Whole Game #
This is the stage most people don't know exists — and it makes more difference to the smoke than almost anything that happened in the field. Getting harvest right in the field means nothing if you rush drying or skip the cure.
The Dry Room: Temperature, Humidity, and Airflow #
Fresh-cut cannabis is roughly 75–80% water by weight. Drying removes that moisture slowly and evenly. The key word is slowly. Rush it — with high heat, low humidity, or strong direct airflow — and you force moisture out faster than the plant's cell structure allows, collapsing terpene compounds before they have a chance to mature.
According to Leafly's drying and curing guide, the target conditions for optimal terpene preservation are:
- Temperature: 60–70°F (15–21°C)
- Humidity: 50–60% RH (relative humidity)
- Airflow: gentle circulation only — no fans blowing directly on the buds
- Light: zero — UV light degrades cannabinoids and terpenes rapidly in dried material
Branches hang upside down (or buds rest on drying racks for smaller operations) for 7–10 days in most cases, though outdoor-grown dense buds can take longer. The farm checks the dry room at least once daily: temperature and humidity logged, any material that looks like it might be developing mold pulled immediately, and the position of hanging branches adjusted if airflow seems uneven.
You know the buds are ready to move to cure when the small stem snaps cleanly rather than bending — this indicates internal moisture has dropped to the right level.
Curing in Jars: Why This Step Changes the Smoke #
Curing is what separates craft cannabis from commodity cannabis. It is also the hardest part to explain to someone who has never tasted the difference.
After drying, buds go into airtight glass jars — filled about three-quarters full to allow some air movement. Per HydroBuilder's harvest guide, the cure targets 55–65% RH inside the jar, at room temperature, in a dark space, for a minimum of two to three weeks. Most craft growers run four to eight weeks for best results.
During the first week or two, jars get "burped" — opened briefly once or twice a day to let fresh oxygen in and excess moisture out. This gas exchange allows the remaining plant enzymes and microbes to continue breaking down chlorophyll (the stuff that makes fresh-harvested cannabis taste harsh and grassy) and refine the terpene profile.
A properly cured jar smells different than a freshly dried one. The harshness drops. The aroma becomes rounder and more complex. The smoke is smoother. This is not marketing — it is chemistry. Regenerative cannabis farms consistently emphasize that the cure is where living-soil, sun-grown flower distinguishes itself: the terpene complexity built in the field gets a chance to fully develop when the cure is done right.
Stage 7: Trim, Test, and Fill Your Jar #
After curing, flower gets hand-trimmed (if not done wet at harvest), sent for third-party lab testing, and prepared for packaging. Nothing leaves a compliant, licensed farm without a Certificate of Analysis — a lab test showing cannabinoid percentages, terpene profile, residual solvent results, pesticide screening, and microbial testing.
For a sun-grown organic farm, the pesticide panel is the one to watch. Organic means no synthetic pesticides at any point in the grow. The lab confirms it. If a test comes back with residuals from a prohibited substance, the batch does not ship — full stop.
This is why the IPM work during veg and flower matters so much. If you manage your pest pressure through biology, scouting, and cultural practices rather than by reaching for a spray bottle, you never have to worry about what the lab finds. The clean test result is the payoff for all those early mornings scouting leaves.
Trimming is the last manual labor step before the product is done. Most craft operations hand-trim at least their top-shelf flower. Trim quality affects the final appearance, the bag appeal, and practically: more leaf left on means more surface area for potential moisture issues in the jar. Our crew trims to order — tight, clean, consistent.
After trimming, the flower goes into labeled jars or bags, lab-tested and compliant, ready for a dispensary shelf or a direct sale.
How Sun-Grown Living-Soil Cannabis Compares to Indoor #
Sun-grown, living-soil cannabis and indoor hydroponically-grown cannabis are fundamentally different products — same plant, very different processes and results.
Here is an honest side-by-side:
| Factor | Sun-Grown Living Soil | Indoor Conventional |
|---|---|---|
| Light source | Full-spectrum natural sunlight with UV-A/UV-B | LED or HPS — mostly PAR spectrum, limited UV |
| Nutrient delivery | Microbial biology breaks down organic matter gradually | Bottled nutrients delivered directly on a schedule |
| Terpene profile | Typically wider and more complex due to UV stress and full spectrum | Often narrower, sometimes described as flat by growers |
| Potency (THC) | Comparable when best practices used; Ganjier notes similar potency with testing | Can be pushed higher with artificial environment control |
| Other cannabinoids (CBD, CBG, CBC) | Often higher — natural light supports broader secondary metabolite production | Lower in many commercially optimized indoor grows |
| Environmental footprint | ~25x less CO2 per gram than indoor, per UBiGro's sustainability analysis | High energy use from lighting, HVAC, dehumidifiers |
| Consistency | Season-dependent; natural variation batch to batch | More consistent between batches |
| Pest management | Relies on biology, scouting, and IPM | Often uses more pesticide inputs in sealed facilities |
| Timeline | 5–6 months outdoors | 3–4 months indoors possible with light control |
Neither is universally "better" — but if you care about what went into your weed, what it cost the planet to produce, and the full complexity of the terpene profile, sun-grown living-soil cannabis has a strong case. The Sunset Lake Cannabis explainer on sun-grown describes it well: the outdoor environment stresses the plant in ways that produce a richer final product, even if it makes the farmer's life harder.
More on how our farm manages the soil side of this equation: Regenerative Farming and Carbon: How Cannabis Helps the Planet.
Frequently Asked Questions #
Q: How long does it take to grow cannabis from seed to smoke? #
The full cycle on a sun-grown outdoor farm runs five to six months from seed to cured flower. Germination takes about a week. Seedling stage adds two to four weeks in the nursery. Vegetative growth outdoors runs from transplant (mid-May to early June) through late August when light cycles shift. Flower runs eight to eleven weeks depending on genetics. Then add seven to ten days of drying plus two to eight weeks of curing. From first seed crack to a jar on a shelf, the minimum is around five months, and most craft growers prefer six.
Q: What is living soil and why does it matter for the quality of your weed? #
Living soil is soil that contains a thriving community of microorganisms — bacteria, fungi, protozoa, nematodes, earthworms — that break down organic matter and deliver nutrients to plant roots naturally. According to Dutch Passion's living soil guide, it is the biological activity in the soil that makes it "living." For cannabis quality, this matters because the plant has a stable, steady nutrient supply without the high-salt swings of synthetic feeding, which may support more consistent terpene and cannabinoid expression. Many growers report better aroma and smoother smoke from living-soil flower, though research specifically on cannabis terpene output vs. synthetic grows is still catching up.
Q: What does sun-grown cannabis actually mean, and why should I care? #
Sun-grown means the cannabis was grown outdoors under natural sunlight — not under LEDs or HPS lights in a warehouse. For the consumer, the main difference is the light spectrum the plant experienced. Natural sunlight contains UV-A and UV-B radiation that most indoor systems do not replicate. This UV stress triggers trichome production in the plant's defense response, which is where cannabinoids and terpenes are stored, according to Project CBD's sungrown analysis. Sun-grown cannabis commonly shows a broader terpene profile and higher non-THC cannabinoid content compared to optimized-for-THC indoor grows. It also produces roughly 25 times less CO2 per gram than indoor cannabis, per UBiGro's sustainability data.
Q: When do outdoor cannabis farmers know it's time to harvest? #
Farmers read three signals: trichome color under a loupe, pistil color on the buds, and the overall smell and feel of the plant. Trichomes shift from clear (immature) to milky white (peak ripeness) to amber (past peak — THC converting to CBN). Most farmers target mostly milky trichomes with a small percentage of amber. Simultaneously, the white hair-like pistils on the buds turn orange-red as the plant matures — roughly 60–80% orange is typically in the target window. Cutting too early means underdeveloped terpenes. Cutting too late means degraded THC and a heavier, more sedating effect.
Q: What is the difference between drying and curing cannabis? #
Drying removes the bulk of the water from freshly harvested cannabis — typically taking 7–10 days at 60–70°F and 50–60% humidity. Curing is the slower, multi-week process that follows, where buds in sealed jars continue to break down chlorophyll and refine the terpene profile. Per Leafly's drying and curing guide, a minimum cure of two to three weeks is recommended, with four to eight weeks producing noticeably better flavor and smoothness. The cure is what transforms freshly dried cannabis — which can taste grassy and harsh — into a smooth, aromatic final product. Skipping the cure is the single biggest quality gap between commercial mass-market cannabis and craft flower.
Q: How do regenerative farms keep pests away without spraying chemicals? #
Regenerative farms use integrated pest management (IPM) — a prevention-first system that relies on daily scouting, beneficial insects, cultural practices, and biological controls before reaching for any spray. The Massachusetts Cannabis Control Commission's IPM Guidance describes IPM as combining monitoring, sanitation, physical barriers, natural enemies, and last-resort use of lowest-risk materials. In practice this means releasing predatory mites against spider mites, ladybugs for aphid control, and beneficial nematodes for soil pests. Companion planting — marigolds, fennel, clover — adds another layer by attracting beneficial insects and disrupting pest-finding behavior. The IPM Institute notes the goal is not zero pests, but keeping pest populations below damage thresholds.
Q: Why does living-soil cannabis often have a more complex smell and flavor? #
Living soil supports a broader biological ecosystem in the root zone, which may allow the plant to access a wider range of micronutrients that contribute to secondary metabolite (terpene and cannabinoid) expression. Per Torrwood Farm's overview of living soil, healthy soil biology improves root-zone conditions and plant resilience, which are associated with more consistent resin development. Many experienced growers report richer aroma and more nuanced flavor from living-soil flower. It's worth being honest: the research specifically linking living soil to higher terpene levels in cannabis is mostly observational and farmer-reported, not yet proven in controlled clinical trials. But the mechanism is plausible and the pattern consistent.
Q: What happens to the soil after the plants are harvested? #
After harvest, a regenerative farm does not just let the beds sit — the post-harvest reset is when the soil system gets rebuilt for next season. Crop debris gets removed or chopped and dropped as mulch. Compost gets turned or added. Cover crops go in — things like rye, clover, or buckwheat that hold soil over winter, fix nitrogen, and add biomass. The regenerative farming cycle treats the post-harvest period as a soil-building window, not dead time. Each year's grow, done right, should leave the soil in better shape than it started — more biology, better structure, more organic matter.
Q: Does sun-grown cannabis have the same potency as indoor cannabis? #
Yes — when best practices are followed, sun-grown cannabis achieves comparable THC levels to indoor cannabis. Ganjier's case for sun-grown notes that testing data from regulated markets shows sun-grown flower can match indoor THC percentages while usually producing a wider and more intense terpene profile. The old assumption that indoor is always stronger is outdated. What indoor can do is produce more consistent, predictable potency across batches by controlling every environmental variable. Sun-grown has more natural variation — a slightly wetter season or a pest pressure event can affect the final numbers — but that is also part of what makes each harvest its own thing.
Q: How does water management work on an outdoor organic cannabis farm? #
Water is one of the most critical inputs on an outdoor farm, and on a living-soil operation, how you water is just as important as how much. Over-watering compacts soil and suffocates the microbes and fungi that live in the root zone. Under-watering stresses plants in ways that hurt yield and can push them to finish early. As covered in our water guide, chlorinated municipal water can harm the microbial community in living soil, so many organic farms use well water, rainwater catchment, or dechlorinated water. Irrigation checks are part of the morning routine every single day during the season — the goal is consistent moisture without saturation, the kind of conditions that let soil biology do its job.
Every Jar Tells the Whole Season #
The flower you open in October represents six months of daily decisions — early mornings in wet soil, late-afternoon scouting in 90-degree heat, harvest days that start before sunrise and end when the last branch is hung. It is not complicated work, but it is consistent, physical, and detail-oriented. Miss a day of scouting during flower and a mold problem you could have caught small becomes a section of the crop you lose.
At Divine Toke, our sun-grown organic flower is a direct product of everything described above — real living soil, real Michigan sunlight, real daily labor by a small crew that cares about what ends up in your jar. If you're curious to try what that tastes like, take a look at what we have available. The difference from mass-market cannabis is not marketing; it shows up in the lab results and in the smoke.
Want to go deeper on the farming side?